


FAQ
Here you can find answers to the most frequently asked questions regarding our products, repair service and warranty. If you do not find the answer you are looking for on the following page, please do not hesitate to contact us.
Indoor Products
-
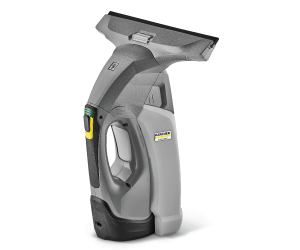
The charging time for your Kärcher Window Vacuum will vary depending on the model that you have;WV1 - Charging time 90 minutesWV2 - Charging time 120 minutesWV5 - Charging time 185 minutesWV Anniversary Edition - 185 minutes
-
We estimate that the battery can be charged approximately over 500 times from empty to full, however there are lots of different factors that can influence the battery life cycle such as climate, charge time, storage, usage and many more factors
-
The following models of Window Vac will run for approximately 20 minutes after a full charge. WV50 / WV50+WV55WV60WV70WV75The WV1 will run for approximately 25 minutes. The WV2 and WV Anniversary Edition will run for approximately 35 minutes. The WV5 boasts an average battery life of 35 minutes, and also has the option for additional batteries for extended cleaning time. The WV6 has a running time of 100 minutes plus a helpful LED display to show you how many minutes of charge remain.
-
The blades should be replaced if you notice signs of wear or if you experience smears or streaks on the surface after cleaning.
-
The Kärcher Glass Cleaner Concentrate is designed for streak-free cleaning of all glass and mirror surfaces and will remove stubborn stains such as grease films, finger marks and emissions.Kärcher Glass Cleaner Concentrate (500ml) - 6.295-795.0.The Kärcher Window Cleaner Concentrate is provided in practical kinked packages for streak-free cleaning of all water-proof smooth surfaces such as glass, windows, mirrors, shower cubicles etc. The cleaning concentrate makes rain fun off faster and delays resoiling.Kärcher Cleaner Concentrate (4 x 20ml) - 6.295-302.0.
-
The Window Vacuum cleans smooth surfaces including windows, tiles, mirrors etc. to a streak-free finish, saving trouble and time. You can also use the machine to remove condensation, clean up spillages and on car paintwork after cleaning.
-
To clean those harder to reach areas we recommend using the Window Vacuum Extension pole. The telescopic extension kit for the Kärcher battery-powered Window Vac means that even high windows can be cleaned perfectly and easily. The pole can be extended from 1.20m to 1.90m. It is suitable for all Kärcher battery-powered Window Vacs. Extension kit for Window Vac - Part number: 2.633-144.0https://www.youtube.com/watch?v=irHRGen3D5E
-
It depends on the size of the glass sections. For best results, the blade of the Kärcher Window Vacuum should be used flat against the glass. If the blade is raised due to the lead-lining then the vacuum may not clean as effectively. Kärchersuction nozzles are available in the sizes of 170mm (17cm) and 280mm (28cm).
-
To ensure the surface being cleaned is left spotless and streak-free, we recommend using the Kärcher Glass Cleaner Concentrate found on our website (Part number: 6.295-795.0). The Kärcher concentrate is designed for streak-free cleaning of all glass and mirror surfaces and will remove stubborn stains such as grease films, finger marks and emissions. If using an alternative brand of glass cleaner or detergent we cannot guarantee the same results. WINDOW TOO DRY: When using the machine ensure to apply a sufficient amount of cleaning solution to the window, this is will remove any friction between the rubber blades and the glass. If you feel any pulling on the rubber blades when driving down the glass or hear a screeching noise, this would indicate the window is too dry. At this point you should apply more solution to the windowPRESSING TOO HARD: Streaks can also be left if the window vac is being pressed too hard on the glass. Gently press the blades to the surface so that they are just touching and slowly glide down the area being cleaned. DIRTY BLADES: It is vital that the rubber blades are free of dirt and debris. You can check this by taking a cloth or kitchen towel and wiping it between the two rubber blades. The suction nozzle can also be removed and soaked in warm soapy water for 15 minutes, then thoroughly rinsed with clean water to clear any blockages.RESIDUAL PRODUCT: The window vac may also leave streaks if there is residue build up on the surface from previous cleaning, such as polish or other cleaning products. The streaks should gradually disappear with regular cleaning with the use of Kärcher Glass Cleaner Concentrate. We do not recommend the use of non Kärcher branded cleaning solutions as this may damage your product and void your warranty.
-
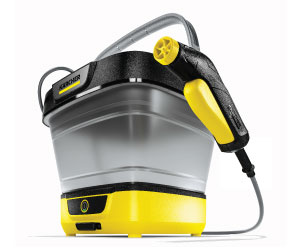
The Kärcher Window Vac is the innovative way to achieve streak-free windows in a flash. The rechargeable handheld vac is lightweight and easy to use, with a lithium-ion battery that can clean upto 45 standard-sized windows in just one charge, as well as mirrors, tiles, and even spills on floors and worktops. To view the Window Vac in action please see our handy video below:
-
To ensure that the Window Vac does not leak from the air vents, or from the bottom of the machine, ensure that the liquid in the collection tank does not exceed the maximum marker level. The Window Vac should be used in a vertical position, starting from the top of the window and using in a downwards motion. If using the vac in another position than vertical the device has to be put in vertical position in between so that the water can flow into the tank. Ensure that the water tank is completely empty prior to using horizontally. Check that the neck section and the intake tube in the dirty water tank are not blocked with dirt, as this can force the water elsewhere, and can cause a leak. Give them a through clean, allow to dry and try the machine again.
-
This is an indication that the battery is fully charged. Turn off the machine using the on/off button located on the handle of the machine.
-
The machine should be charged once the battery has been fully drained. This will prolong the life of the battery. The machine should never be charger for short bursts as this will deplete the battery life and could cause the premature failure of the machine.To achieve a full battery charge the Vac should be charged as per the below guidelines: WV50 / WV55 / WV60 / WV70 / WV75 - should be charged for 120 minutes.WV2 (all model variants) - should be charged for a period of 140 minutes.WV5 (all model variants) - should be charge for 210 minutes.WV1 - should be charged for 120 minutes.WV6 - should be charged for 170 minutes
-
The Kärcher Window Vac is the world's first Window Vacuum. Smooth surfaces such as windows, tiles, mirrors etc. are cleaned without streaks in no time at all. Innovative water extraction takes in the dirty water before it drips. The window vac cleans hygenically without leaving streaks. It is very easy to handle and ready to use everywhere due to its cordless operation.
-
The 20ml sachets of Glass Cleaner Concerntate should be diluted to the ratio of 1:10 (1 part to detergent to 10 parts water).
-
The PH Level in the Kärcher Glass Cleaner Concentrate sachets (RM 503) (Part number: 6.296-302.0) is 5.4. The PH Level in the 500ml Glass Cleaner Concentrate bottle (RM 500) (Part number: 6.295-795.0) is 10.3.
-
The suction heads available come intwo sizes, 280mm and 170mm.The WV50-75 models have the large head, Part No. 4.633-043.0, and small head, Part No. 2.633-002.0The WV2 has the large head, Part No.4.633-019.0, and small head, Part No. 2.633-112.0The WV5 has the large head, Part No.4.633-093.0, and small head, Part No. 2.633-112.0The rubber blades are the same for all machines, - 280 mm Part No. 2.633-005.0 - 170 mm Part No. 2.633-104.0
-
Yes, the seal needs to be removed in order for you to be able to press the trigger and operate the spray bottle.
-
The telescopic extension kit can be extended from 1.20m to 2.00m. The telescopic extension kit is suitable for use with all Kärcher Window Vacuums (Part number:2.633-111.0).
-
To remove the water tank, press in the black half-moon shaped buttons either side of the upper neck section of the Vac. Lift the neck section away from the base. The water tank will then pull forwards and away from the base. Twist the black water insert and pull out of the bottle. The tank can then be cleaned. Not suitable for use in a dishwasher.
-
A replacement rubber bung can be purchased for your Window Vac. For the WV50 - WV75 (Part number: 5.633-012.0). For the WV2 - WV5 (Part number: 4.633-094.0).
-
The blades can be removed by sliding them in either direction out of the suction nozzle. The blade can then be cleaned by wiping with a clean damp cloth. Do not use an abrasive such as a scouring pad as this will damage the rubber.
-
The suction nozzle can be released by pushing the grey button underneath and pulling it in an upwards motion from the neck of the Vac.The replacement suction nozzle can then be attached.
-
Unfortunately the serrated blade is not available to purchase separately.If you experience a problem with this item, you will be required to purchase a replacement suction nozzle. WV50-WV75 Suction Nozzle (280mm) Part number - 4.633-043.0 or Suction Nozzle (170mm) Part number - 2.633-002.0WV2 Suction Nozzle (280mm) Part number - 4.633-019.0 or Suction Nozzle (170mm) Part number - 2.633-112.0WV5 Suction Nozzle (280mm) Part number - 4.633-093.0 or Suction Nozzle (170mm) Part number - 2.633-112.0WV1 Suction Nozzle (280mm) Part number - 4.633-121.0
-
Yes, the cloths are available in a pack of 2. The part number for this is 2.633-109.0.
-
Replacement microfibre pads are available in a pack of 2. Please visit the accessories page on your local website for purchasing options
-
As a result of the practical vacuuming function and simple handling, window cleaning with Kärcher's new battery-powered Window Vac is noticeably easier and quicker than it ever has been using traditional methods.However,we do recommend that children supervised when using the Window Vac. Individuals with reduced physical, sensory or other capabilities should consult the operating manual and the section 'Safety instructions' for further information.
-
The Kärcher Window Vacuums are not recommended for dust. It will not be effective and may cause damage to the Window Vacuum which would not be covered under the terms and conditions of the product warranty. The Window Vac is designed for vacuuming liquids. For dust removal we would recommend a Kärcher Vacuum Cleaner which you will find on our website.
-
If the battery is losing its performance, the charge/operations display will begin to blink slowly and the appliance will shut off after a certain time. The battery will then require recharging. Switch the appliance off after each cleaned surface to increase your operation time per battery charge.
-
The Kärcher Window Vacuum is designed to vacuum liquid from surfaces and will not produce steam. If you require a Kärcher Steam Cleaner please visit the Kärcher website.
-
Yes, the Kärcher microfiber pads can be washed by hand or in your washing machine at temperatures of up to 60°C. Do not use fabric conditioner as this may damage the pads.
-
The Kärcher Window Vacuum is to be used for residential duties. The product warranty will be void if using for a business or commercial purpose.
-
The Kärcher hipbag is designed to ergonomically and sensibly carry the Window Vacuum and spray bottle. This provides you with even more convenience when cleaning windows. Hip Bag - part number: 2.633-006.0
-
To view the full range of accessories for the Window Vac please visit the product pages at www.karcher.co.uk this webpage
-
The Kärcher window Vacuum range leaves surfaces streak free and completely dry in no time at all.Each package comes with different accessories with each model also varying in specifications and battery run time.To find out more about our current range please visit https://www.kaercher.com/uk/home-garden/window-vac.html
-
All Kärcher Window Vacuums come with a 2 year warranty from the date of purchase.
-
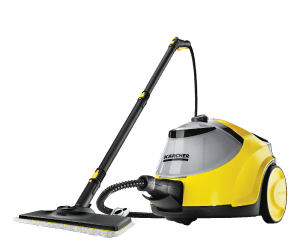
Kärcher Steam Cleaners bring a revolutionary approach to the cleaning of your home. We've harnessed the dirt-shifting power of pure steam to deliver extraordinary cleaning performance from nothing more than tap water. Whether you're looking to remove tough grease or everyday dirt from your kitchen, bathroom or those hard to reach nooks and crannies throughout the home, Kärcher steam cleaners will help you get the job done with the minimum amount of effort. For further information please visit our website.
-
With no chemicals or scrubbing, a KärcherSteam Cleaner effortlessly removes stubborn stains and even limescale and mould throughout the home. Nothing could be quicker or easier than cleaning with steam. It's also hygenic, killing 99.99% of bacteria*. With low water consumption and no detergent required, steam cleaning not only saves you money but it's also good for the environment and a healthy choice for you and your family. *When thoroughly cleaning with a Kärcher steam cleaner 99.99% of all common household bacteria will be killed on common household hard floor surfaces.
-
Using natural steam, Kärcher Steam Cleaners guarantee hygiene and cleanliness on all surfaces throughout the house. With their high steam temperatures and pressurised boilers powerful steam penetrates dirt and grime leaving surfaces clean and removes 99.99% of household bacteria*. *When thoroughly cleaning with a Kärcher steam cleaner 99.99% of all common household bacteria will be killed on common household hard floor surfaces.
-
Cleaning with steam is cleaning without harsh chemicals. You must only add water into your Steam Cleaner. The use of detergents or chemicals may damage your Steam Cleaner and will invalidate your warranty.
-
Distilled/Deionised water can be used in the SC1, SC2, and SC3 models. However this cannot be used in SC4 + SC5. The SC4 and SC5 should use a combination of 50% distilled, 50% tap water. Using 100% distilled water with the SC4 and SC5 can cause too much water to be released into the boiler which causes the steamer to malfunction producing hot water instead of steam.
-
No, you should never use condensation water from a tumble dryer in your Steam Cleaner.
-
You can use a Kärcher Steam Cleaner to refresh the surface layer of your carpets or to spot clean. Our range of steam cleaner’s are not designed for deep cleaning carpets. For deep cleaning carpets please see our range of Spray Extraction carpet cleaners.
-
The Steam cleaner can be used to clean the hob and the door of an oven. We do not advise cleaning the inside of an oven for safety reasons. Regular cleaning is essential for kitchen hygiene. There's no need to spend hours scrubbing hobs and oven doors with chemicals, as the best way to clean these is with steam.
-
Steam Cleaning is a a healthy choice for you and your family. Unlike cleaning detergents steam cleaners do not leave behind potential allergy-triggering residues on the cleaned surface. Allergy-sufferers can breathe easier, as the steam binds the dust, keeping allergens (house dust mites and their secretions) from being dispersed, this improves an indoor environment considerably.
-
Along with freshening up your clothes and fabrics, some of our steam cleaners can even be used for ironing using our specially designed Iron attachment (Part number: 2.863-208.0) which saves up to 50% of time compared to conventional ironing.
-
Kärcher steam cleaning doesn't require the use of harsh chemicals, which makes it ideal for cleaning and dusting household plastic plants. Gently clean by moistening the plants at a distance of 30 to 40 centimetres, and wipe off the dust with a cloth.
-
Cleaning with steam is cleaning without chemicals. The combination of steam power and temperature alone dislodges stubborn dirt and makes cleaning agents surplus to requirements. This conserves both water and the expense of cleaning agents.
-
Steam cleaning is very economical. Just one litre of normal tap water will produce up to 1,700 litres of steam! That is enough for around 20 minutes of steam cleaning.
-
With just tap water, a Kärchersteam cleaner effortlessly removes stubborn stains, Limescale and mould throughout the home. Nothing could be quicker or easier than cleaning with a Kärcher steam cleaner killing 99.99%* of bacteria as well as saving you time and water compared to using conventional methods.* Thorough cleaning with the Kärcher steam cleaner removes 99.99% of all common household bacteria from common household hard surfaces.
-
Steam cleaners work similarly to a pressure cooker. Water is heated in a closed boiler in the steam cleaner until it boils - this causes the formation of steam. This takes from thirty seconds, to eight minutes per litre of water depending on the machine. Once the water boils, the steam is released in measured quantities through the 'steam gun'. The higher the steam pressure, the quicker the release rate - and thus the dirt-dissolving performance.
-
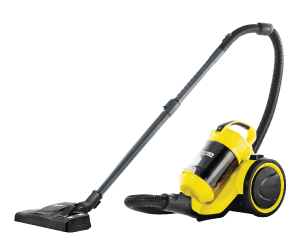
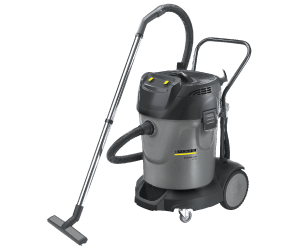
Wet & Dry Vacuum Cleaners are perfect for sucking up dust, sludge, rubble, stones, shingle and liquids. For further information on the Wet & Dry Vacuum Cleaners, please click here.
-
Kärcher filters and filter bags are made from environment-friendly materials. They can therefore be disposed of with your normal household rubbish, provided that you have not sucked in substances that are not permitted to be thrown into household waste.
-
Yes the Kärcher Wet & Dry Vacuums can be used by anyone; however we would recommend that persons with limited physical, sensory or mental capacities, lacking experience and/or skills are accompanied and supervised by a person in charge of their safety or they have received precise instructions on the use of the appliance and have understood the resulting risks. Children may only use this appliance if they are over the age of 8 and supervised by a person in charge of their safety, or if they have received instructions on the use of the appliance and have understood the resulting risks. Children should be supervised to prevent them from playing with the appliance.
-
Certain materials may produce explosive vapours or mixtures when agitated by the suction air. Never vacuum up the following materials: explosive or combustible gases, liquids or dust particles -reactive dust particles, reactive metal dust particles such as aluminium, magnesium or zinc in combination or highly alkaline or acidic detergents, undiluted strong acids or alkalines, organic solvents such as petrol, paint thinners, acetone or heating oil. In addition, these substances may cause the appliance materials to corrode.
-
The filling level of the Kärcher filter bag depends on the type of dirt that is being vacuumed. The bag will need to be replaced more frequently when vacuuming dust, fine sand etc. Clogged or full filter bags can burst so ensure to replace the Kärcher filter bag (Part number: 6.904-322.0) in a timely manner.
-
We would advise you to use the cartridge filter on your Kärcher Wet & Dry Vacuum at all times. Once finished please ensure the filter is completely dry before re-attaching.
-
If the cleaning power of the appliance deteriorates we recommend checking the following: The accessories, suction hose or suction tubes are not clogged. If so, remove the obstruction using a stick or long object. If the filter bag is full, remove and install a new one. Check that the foam filter is not contaminated by cleaning it under running water. Ensure the cartridge filter is clean, by knocking off any dirt from the cartridge and rinsing under running water if necessary. If the filter is damaged, then this should be replaced.
-
You must never vacuum hot ashes using your Vacuum Cleaner. Cold ashes should only be vacuumed when using a pre-filter (see image below) which can be purchased separately. (Part number: 2.863-139.0 / 2.863-161.0).
-
The cartridge filter on your Kärcher Wet & Dry Vacuum should be left on whilst being used for liquids. Once finished please ensure the filter is completely dry before re-attaching.
-
Ensure the cartridge filter is clean by knocking off any dirt from the cartridge and rinsing it under running water. Do not wipe or brush down. Allow to dry completely prior to reusing.
-
All Kärcher sledge steam cleaners will alert you by flashing red once the water tank is running low and needs re-filling to the 'Max' marking.
-
The solid red light means there is no water in the steam boiler. Overheating protection of the pump was triggered, please:1. Turn off the appliance.2. Fill the water reservoir.3. Turn on the appliance.Another reason for the light to be solid red is that the water reservoir has not been inserted properly or is calcified, please:1. Remove the water reservoir and rinse.2. Insert the water reservoir and press downwards until it clicks.
-
Yes, you can wash dirty floor cloths and terry cloths in the washing machine up to 60°C. Do not use a liquid softener as this would affect the ability of the cloths to absorb dirt. The cloths can also be tumble dried.
-
A build-up of Limescale can increase the heat-up time of a Steam Cleaner. For further information please see ‘How do I descale my Kärcher Steam Cleaner?’
-
A build-up of Limescale can increase the heat-up time of a Steam Cleaner. For further information please see ‘How do I descale my Kärcher Steam Cleaner?’
-
Instructions for De-scaling your Kärcher Steam Cleaner.Step 1. Purchase a Kärcher de-scaling agent. Part Number 6.295-206.0 - RM descaler sticks 9x13 g.Step 2. Dissolve the descaling stick into 1 litre of warm water.Step 3. Pour the solution into the boiler and allow it to react for approximately 8 hours. Do not screw the safety lock onto the appliance while you are descaling.Step 4. Create a separate solution for the steam cap.Step 5. Clean the threads on the cap with a toothbrush and rub Vaseline around once clean.Step 6. Once the descaling is completed, empty the solution from the machine. A small amount of solution will remain inside the boiler. Rinse the boiler 2 or 3 times with clean, cold water to remove any residues of the descaler.
-
The boiler of your Steam Cleaner must be rinsed out after every 5 fills. This will reduce the build up of scale within the heating vessel. Fill the boiler with water and shake the cleaner vigorously. This will loosen any scale that has settled onto the bottom of the boiler vessel. Empty the machine by pouring out the liquid.
-
When you have finished using the machine make sure that you have released all remaining pressure from the hose and gun assembly. When the pressure has been released you can then unscrew the safety cap. Drain the machine of any remaining water in the boiler. Store the machine with the accessories removed, the boiler empty and the safety cap removed.
-
The safety cap may be difficult to remove due to the steam cleaner not being de-pressurised after use, or if there is a build-up of Limescale in the steam cap. For further information please see ‘How do I depressurise my Steam Cleaner?’ and ‘How do I descale my Steam Cleaner?’
-
When in use, a pressure control valve inside the safety cap locks in place, restricting the removal of the cap. This is a safety feature of the machine, preventing the escape of steam. The safety lock cannot be opened as long as a slight pressure remains in the boiler. After use: 1. Turn off the machine and disconnect the mains plug from the socket. 2. Push the steam switch until steam discharge stops. The boiler of the appliance is now depressurised. 3. Remove the cap and store separately from the machine. **Please note that a residual amount of steam may be emitted when you open the safety lock. be careful when opening the safety lock, if the machine has been in continuous use for a long time the safety cap may be hot.
-
Check that the steam trigger isn't turned to the child-lock setting. This is indicated by an image of a lock on the trigger gun.
-
Replacement Window Vac chargers are available to order from our online shop at www.karcher.co.ukThe part number for a replacement Window Vac charger for the WV1 – WV5 range is 2.633-115.0.You can purchase a new charger from our online shop by clicking on the link below:https://www.kaercher.com/uk/accessory/window-vac-battery-charger-26331150.html#WfIJI7wC608MDLAW.97The part number for the WV6 charger is 2.633-511.0.This can be purchased from our online shop at the following link:https://www.kaercher.com/uk/accessory/wv-6-small-suction-nozzle-26335110.html
-
Ensure that the filter is in place & that the vacuum filter bag has been inserted correctly. Check that the suction hose is fitted correctly and has no signs of wear and tear.
-
Your Kärcher Wet & Dry Vacuum may switch itself off due to the waste container being full. You should empty the container straight away and ensure the filter is not blocked.
-
When the steam cleaner is first turned on some water will be produced, while the attachments and accessories are still cold and this will condensate the initial steam produced. This may occur for a couple of minutes. Ensure the floor cloth isn’t attached to the floor tool until the machine is at full temperature and only steam is being produced, otherwise your cloth may become saturated with water. For the SC1 and SC2 Steam cleaners, the water tank may be over full. Ensure that the tank is only 3/4 full, which allows steam to be generated in the boiler. Ensure that the machine has reached operating pressure, if not, wait until the light indicates that the machine is ready. Ensure that the controller is set to steam mode. Your steam cleaner may also need to be descled, for more information please see ‘How do I descale my steam cleaner?’. For users with the SC3 you may need to replace the descaling catridge (Part number: 2.863-018.0) If the problem persists please contact our Customer Serices team.
-
Yes, the Kärcher Window Vacuum is ideal for removing condensation.
Servicing and Repairs
-
We are very sorry to hear that you have encountered a problem with your Karcher product.Please enter a description of the fault into the search box. This will provide you with troubleshooting guides for resolving the problem.If this is not successful then please email our helpline team at helpline@karcher.co.uk Please ensure to provide the following information:NameAddressTelephone NumberModel Number of MachineSerial Number of MachineDate of purchase (where possible please attach your proof of purchase)Description of Fault
-
Replacement accessories can be purchased by visiting our online shop at https://www.kaercher.com/uk/#IqOh9IqMGI5wfC4F.97Replacement parts can be ordered by calling the Karcher Helpline team on 01295 234020.You can also email us at helpline@karcher.co.ukYou will need to include a picture of the silver label from the base of your machine so we can send you a copy of the spare parts manual. Once you have located the part number(s) that you require we will be able to advise of the price and availability.
-
Please see the table below to see the prices for an out of warranty repair.Please note that we do not offer a repair service on the Window vac range. If you require any help with your Window Vac please contact your Customer Service Team. Pressure WashersK2£114.00K3£128.00K4£153.00K5£172.00K6£175.00K7£185.00KHB 5 / KHB 6£153.00Steam CleanersSteam Cleaners (all models)£152.00Hard Floor CleanersFloor Cleaners (exc. FC 5 Cordless)£103.00FC 5 Cordless & EWM 2£152.00FC 7£170.00Vacuum Cleaners (Inc. Ash Vac)Vacuum Cleaners (all models inc. ash vac)£93.50Floor PolisherFloor Polishers (FP 303)£75.00Portable CleanerOC 3 Portable Cleaner£75.00SweepersSweepers (S 650)£99.00Electric Broom Electric Broom No RepairWindow VacsWindow VacNo RepairGarden PowerLawn Mowers£153.00Lawn Trimmers£75.00Hedge Trimmers£75.00Leaf Blowers£128.00Chainsaw£128.00Tree Lopper£128.00OtherInspection Only£47.00Paid BOX£10.00European ProductsSteam Vacuums (All) (Inspection Only)£47.00RoboVac (RC 3000) (Inspection Only)£47.00Other (Inspection Only)£47.00Trade Pro RangePro HD 200£180.00Pro HD 400£180.00Pro T 200£93.50Pro NT 200£93.50Pro Puzzi 400£175.00Pro KM 400£175.00Pro BR 400£175.00
-
Your Kärcher product is covered under warranty by Kärcher (UK) Limited to be free of defective parts and materials for a period of 24 months from date of purchase (or as otherwise stated at the point of sale) providing the product is used for normal residential duties. The warranty shall not extend to defects arising from the product being used for purposes beyond normal residential use, particularly when it goes beyond the purpose for which it was designed such as in commercial, industrial or rental application. If the product has been purchased through a business account, it will be assumed that the intended use is for that business, voiding any warranty cover.All warranty periods commence on the date of purchase and are not transferable. This means that if the machine is second-hand or purchased from an individual seller who is not VAT registered, the product would not be covered under any form of warrantyThis warranty does not extend to defects which result from misuse, neglect, accident, abuse, improper handling, freezing, normal wear and tear, use of improper chemicals or non-compliance with the Operators Instruction Manual.The warranty will be invalidated if the product has been subject to unauthorised repair or modification. This guarantee is limited to the provision of repairs, free of charge within the specified period providing the above conditions are met and proof of purchase is provided. Karcher (UK) Limited shall not be liable in any event at any time for any indirect or consequential loss or damage. The rights and benefits under the warranty are additional to your statutory rights which are not affected by this warranty. Machine and accessories MUST be protected from frost. Frost damage is not covered by the warranty!Product Registration is not a form of warranty cover and cannot be referred back to in the event that a problem arises within the warranty period. It is recommended that you store your proof of purchase in a safe location as this is your proof of warranty and would be required in the event that a problem arises within the warranty period. Failure to provide this may result in the warranty claim being refused and any parts or repairs required would be chargeable.
Outdoor Products
-
Your Pressure Washer should be stored in a frost-free environment. If being stored in a garage or shed we recommend ensuring that it is:1. Fully drained after use.2. The pressure washer should be raised off of the ground on a bench or table. 3. Wrap it in a blanket or place into a box. For information on how to drain your pressure washer, please see 'How do I drain my pressure washer after use?'
-
Whilst a static water source can pose potential threats such as legionnaire’s disease, the risk of this in the UK is very rare. In order for the legionella bacteria to grow there needs to be a number of supporting elements, including high concentrations of rust, algae and organic particles. It is these which supply the bacteria with a source of iron as well as nitrogen which is crucial in order for it to survive. In order for the bacteria to grow a water butt would need to have the above elements and be between 20-45°C; the optimum temperature for it to breed, for a sustained period. As rust is very rare in water butts, the above supporting elements would have to be there, stagnating, in temperatures around 36°C for a sustained period. In the UK the temperature varies most nights, as well as from season to season meaning that the temperature would not normally be sustained for a prolonged period of time. All of these factors mean that the risk of catching Legionnaires' disease from a water butt is very low. Ensuring you regularly clean and keep your water butt rust free will help reduce the risk of bacteria developing.
-
A system seperator, or non-return value should be used on the end of your garden hose which you connect onto the tap. This will protect your drinking water from possible contamination. For further information on our range of hose connectors please visit this webpage
-
Your garden water supply should be rigid and at least 25 feet in length (7.5 metres). The hose should be fully uncoiled and laid out flat with no kinks or twists and secured to your Kärcher pressure washer using a free flow connector.
-
For help in choosing the right Pressure Washer for you please visit the 'What would you like to clean' section at this webpage
-
No, a Kärcher Pressure Washer should only be used for external cleaning.
-
The maximum temperature of water to use with a Kärcher K2 – K6 Series Pressure Washer is 40°C. The Kärcher K7 Series Pressure Washers can use water up to 60°C. Do not exceed this temperature as this could damage the product and would invalidate your warranty.
-
Only use an electrical extension cable which has been approved and labelled for this purpose and has an adequate cable cross-section outdoors: 1 - 10 metres: 1.5 mm2; 10 - 30 metres: 2.5 mm2. Please ensure it is fully unwound from the cable drum when in use.
-
To ensure you get the best results with your Pressure Washer and to reduce the risks of a problem occurring, we recommend following the below guideline for setting up your machine: 1. For optimum results, the garden hose should be 15 metres (50ft) long. The minimum requirement is 7.5 metres (25ft). This should be fully uncoiled and laid out flat. 2. A free-flow connector should be used on the end of the hose which connects on to the machine. 3. A non-return valve/Aquastop connector should be used to connect the garden hose to your tap. 4. If using an extension lead for the electrical supply, this should be no longer than 10 metres in length. This should be fully unwound when in use. For further information please see our handy video:Please also see the instruction sheet on how to set up you Kärcher pressure washer. A copy of this is provided with your machine in the box. If you have misplaced this, please download 'How to set up my Pressure Washer.'
-
Your Pressure Washer may have an air block. We recommend following the below steps in order to resolve this problem.Machine set-up:1. Your garden hose should be at least 25ft (7.5m) in length and fully uncoiled from any reels when in use with your Pressure Washer.2. A free-flow connector (with no restrictions for the water) should be used to connect the garden hose to the machine.3. A non-return valve / aqua-stop connector should only be used on the tap end of the garden hose.4. If using an electrical extension lead, please ensure this is no longer than 10 metres in length.5. Always ensure the filter inside the inlet of the machine is free of dirt and debris (this is located behind the black connector on the water inlet of the machine).Clearing Air Blocks: 1. Disconnect your Pressure Washer from the electricity supply.2. Remove the black high pressure hose from the outlet of the machine. (If your machine has a hose reel, remove the trigger gun from the hose and leave the hose connected to the machine).3. Connect the garden hose to the inlet of the machine. 4. Turn on the water supply but leave the machine unplugged from the electricity supply.5. Leave the water running through the machine for a period of 5-7 minutes.6. Re-connect the black high pressure hose.7. Squeeze the handle of the trigger gun to draw the water through the hose and into the gun until water exits from the lance.8. Plug the machine back into the electricity supply and turn on at the on/off switch. 9. Squeeze on the trigger gun.If this does not resolve the problem, please contact your Customer Service team.
-
Use only detergents recommended by Kärcher with your Pressure Washer. Use of non-recommended chemicals could cause significant damage which may not be covered by your warranty. After using chemicals, always run fresh water through your machine.
-
Kiln Dried Fine Sand. This is available from most local builders merchants.
-
To convert bar pressure to PSI, mutiply the bar pressure by 14.75.
-
Our domestic pressure washers use 15/40 engine oil. This can be any brand of oil.
-
Once you have finished using your machine always remember to drain the unit. If you have been using detergent with the machine:1. Take the bottle out of the plug 'n' clean section, or if you have a K2 or Compact model, submerge the detergent suction tube into a container with clean water.2. Run the Pressure Washer for approximately one minute on the low-pressure setting.Once you have cleaned the detergent system, follow the below steps to prepare the machine to be stored:1. Turn the machine off2. Disconnect the water supply hose hose from your high pressure washer. 3. Remove the lances from your handgun.4. Pull the trigger gun until no more water is coming out of the machine. 5. Disconnect the handgun from the high pressure hose.6. Turn the machine back on for 5 seconds and off again to get the last few drips out.7. Disconnect the high pressure hose and store on your machine If you would like further information on how to complete this task, please see the short video below:
-
A leak can occur if the black ‘O’ ring seal is missing/damaged on the end of the high pressure hose. To check this:1. Remove the hose from the gun.2. Make sure that the black O-ring is complete and does not have any damage or cracks.If the O-ring seal is missing or damaged please replace (Part number: 2.640-729.0.) If this problem persists please contact your Customer Service team.
-
A leak can occur if the ‘O’ ring seal is missing from the end of the High pressure Hose. Remove the hose from the gun and complete an inspection. If the seal is damaged or missing please contact your Customer Service team to obtain a replacement.
-
Kärcher manufacture a range of submersible drainage pumps. To view the full range and to find out more please click here.
-
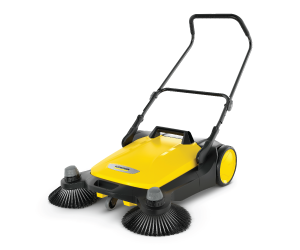
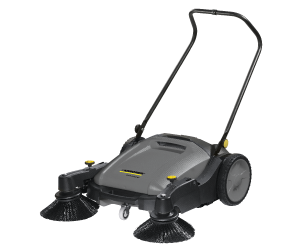
Kärcher Sweepers clean paths, patios, driveways and gardens up to five times faster than a dustpan and brush. Sweepings are immediately collected in the large capacity container and the long bristles of the side brushes ensure a thorough clean right to the edges. The Sweeper also boasts a foldable handle for easy storage.
-
16 Litres
-
Say goodbye to the dustpan and brush! Kärcher Sweepers clean 5 times faster; ideal for pavements, roads, driveways and courtyards. These machines transfer the waste to an on-board waste container. Convenient, quick, clean and thorough! The Kärcher Sweeper is a manually operated device, which works by pushing it along from behind. As the Sweeper moves, it collects debris from the surface and stores it in the collection tank. Simply remove the tank after use and pour the dust and dirt collected into your rubbish bin.
-
No, for best results you will need to push the Kärcher Sweeper.
-
The Kärcher eco!ogic setting reduces water and power consumptions by 20% at the flick of a switch. The eco setting is ideal for cleaning work which requires less water such as: cars, bicycles or garden furniture.
-
Yes, but you would need to purchase the Kärcher Extension Hose Adaptor set (Part number: 2.643-037.0). The two-part adaptor set is for the connection of an extension hose with screw thread to a Pressure Washer with a Quick Connect System. This can be found on our website below;https://www.kaercher.com/uk/accessory/adapter-set-extension-hose-26430370.html
-
Kärcher Pressure Washers are more than 90% recyclable.
-
As the inventor of high pressure cleaning Kärcher has unique specialist knowledge, which is unrivalled on the market. For over 80 years Kärcher has been perfecting the art of pressure cleaning and is constantly in the spotlight on account of its outstanding innovations. As the global market leader we offer the most reliable Pressure Washers on the market. We manufacture all of our devices in our own factories to the highest production standards, and all our pressure washers being 100% tested for functionality and performance before they are shipped to the customer. That's why we can always guarantee our customers that they are purchasing perfect products, which speak for themselves in terms of their performance capabilities and long service life.
-
Pressure Washers save up to 3,100 litres of water per hour compared to cleaning with a water hose. Water is becoming increasingly scarce. For this reason Kärcher has always strived to conserve this vital resource as much as possible. Kärcher's continual development of Pressure Washer technology ensures good cleaning results with low water consumption. In comparison to cleaning with a water hose, Kärcher Pressure Washers use around 80% less water. This is good for the environment while it also saves money.
-
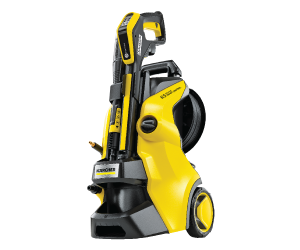
The Kärcher Compact Range is impressive due to their incredibly compact design which includes all of the cleaning performance you would expect from a Kärcher Pressure Washer. Our K2 compact range is light weight, and incorporates a carry handle as well as storage for the lances handgun and high pressure hose. Our K4 and K5 compacts have water cooled motors which are designed to be durable, as well as having a robust, extendable telescopic handle which allows for easy transportation. Once the telescopic handle has been retracted it can also be used as a stable carrying handle. A second handle on the underside makes lifting with both hands possible and helps to prevent strain on the back. The Quick Connect hose connection can be connected to the gun and machine and easily released again at the push of a button. The practical accessory storage means the hoses and guns can be stored quickly and simply directly on the rear of the unit. An integrated detergent suction hose means that the devices are also suitable for use with Kärcher detergents.
-
Almost 60% of the plastic components used in Kärcher products are recycled. The packaging consists of 50% recycled material, and no styrofoam is used. The other 50% comes from sustained forestry.
-
The Upright devices are meticulously designed, through to the smallest detail. The Plug 'n' Clean detergent system can apply detergent directly to the area being cleaned and can be changed with just one hand. Simply remove the old bottle, insert the new one and off you go. In all models, the high-pressure hose can be stored directly on the device after use. The devices are equipped with generously proportioned hose hooks for this purpose. The Premium models have hose reels for clean and convenient storage of the high-pressure hose. With Quick-Connect, Kärcher also offers a convenient quick-coupling system. This means that the high pressure hose can be connected to the gun and machine and can be released again at the push of a button. This means it can be stored quickly and easily. The accessories can also be neatly stored directly on the device.
-
The 3-in-1 car shampoo guarantees optimal cleaning and maintenance of vehicles of all types. The active dirt remover removes stubborn oily and greasy dirt effortlessly. The quick-dry formula makes the tedious job of polishing vehicles easier. The ultra gloss formulation gives the vehicle a perfect shine. For further information please visit this webpage
-
The Connect 'n' Clean system is the most effective way to apply detergent. The innovative Foam Nozzle produces a thick powerful foam which is ideal for cleaning: cars, motorcycles and can even be used on patios, decking and building façades. The foam jet is available as a set with different detergents. The practical quick-change system, allows the user to change between detergents depending on the area they wish to clean.For more information on the Foam Nozzle, please view our handy video below:
-
The Kärcher garden pumps are ideal for watering the garden using alternative water sources such as cisterns and water-butts. For further information on garden pumps please visit this webpage
-
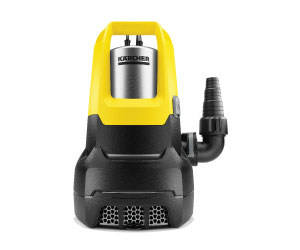
Kärcher's powerful and robust dirty water pumps remove large volumes of dirty and clear water quick and easily. Our pumps transport water to any location with a pumping capacity of up to 18,000 litres per hour. Contaminated water is not a problem for the SP submersible pumps. They reliably pump water with dirt particles up to 30 mm in diameter from ponds or flooded basements.For more information on the available range of submersible dirty water pumps please visit this webpage.
-
For every 10 metres pumped upwards, you will lose 1 Bar of Pressure.
-
The Kärcher Rain Sensor can be connected to the Kärcher water timers ST6 and ST6 Duo. The sensor measures the precipitation and adjusts the watering schedule accordingly. The water only flows when needed, meaning it is cost effective and environmentally friendly. No power supply is required. To view this product please visit this webpage.
-
Sealing collars can be attached at any point on the Kärcher Rain System hose. They can be easily installed and completely seal holes from the sprinklers or drippers that are no longer required. For further information on the Sealing Collars please click here.
-
Spray collars or Micro Spray Nozzles are part of the Kärcher Rain System. They can be attached anywhere on the hose. Installation is fast, easy and does not require tools. The integrated needle on the opened spray collar is simply stuck into the hose. By closing, the spray collar is securely fixed to the hose. The alignment of the spray angle can be adjusted horizontally and vertically thanks to the rotatable head. On the nozzle, the water volume can be adjusted from 0-55l/h according to requirements and in order to conserve resources. For further information on the Micro Spray Nozzles please visit this webpage.
-
To clean the nozzles on your Kärcher Patio Cleaner:1. Release the U-shape metal clip holding the nozzles in place and remove the nozzles. 2. Soak in a solution of warm soapy water.3. Insert a pin into the nozzle to push out any blockages. 4. Rinse the nozzles under clean running water. 5. Place the nozzles back into the patio cleaner in re-insert the metal clip to hold in place. If the nozzles are damaged, replacements are available to be purchased. If you are unsure which colour nozzles to use with your machine please see 'What colour nozzles should I use with my Patio Cleaner?’
-
Leaks from this connection point can occur if the seal is missing or damaged. Check that the yellow seal inserted into the end of the spray lance is in place. If the seal is missing or damaged, replacement seals are available to purchase in our Replacement ‘O’ ring set (Part number: 2.640-729.0).
-
To remove blockages from your lances:1. Soak the spray lance in a solution of warm, soapy water.2. Insert a pin into the nozzle of the lance to push out any dirt which may be blocking the nozzle. 3. Rinse under clean running water to remove any dirt or detergent residues before commencing use.If the blockage has not been removed, please contact your Customer Services team.
-
This may be caused by a build-up of dirt blocking the nozzle of the lance. Please see'How do I clean my spray lance?’ If this problem persists with more than one spray lance then ensure to clean them all. If this is not successful in resolving the problem please see 'Why is my Pressure Washer pulsing/hunting?'
-
Please check the rotating arm spins freely by hand, and is not stiff. If it is stiff to turn, then the brass bolt, has tightened, and needs to be loosened with a spanner. If this does not resolve the problem, the nozzles of the patio cleaner may be blocked with a build-up of dirt. Please see ‘How do I clean the nozzles in my Patio cleaner?’ If this does not resolve the problem then please contact your Customer Service team.
-
The nozzles of the patio cleaner may be blocked with a build-up of dirt. Please see How do I clean the nozzles in my T Racer patio cleaner? for further help. If required, replacement nozzles are available for purchase. Please see What colour nozzles should I use with my T-Racer Patio Cleaner? for further help in choosing the correct nozzles.
-
Your Pressure Washer may have an air block. We recommend following the below steps in order to resolve this problem.Machine set-up:1. Your garden hose should be at least 25ft (7.5m) in length and fully uncoiled from any reels when in use with your Pressure Washer.2. A free-flow connector (with no restrictions for the water) should be used to connect the garden hose to the machine.3. A non-return valve / aqua-stop connector should only be used on the tap end of the garden hose.4. If using an electrical extension lead, please ensure this is no longer than 10 metres in length.5. Always ensure the filter inside the inlet of the machine is free of dirt and debris (this is located behind the black connector on the water inlet of the machine).Clearing Air Blocks: 1. Disconnect the Pressure Washer from the electricity supply.2. Remove the black high pressure hose from the outlet of the machine. (If your machine has a hose reel, remove the trigger gun from the hose and leave the hose connected to the machine).3. Connect the garden hose to the inlet of the machine. 4. Turn on the water supply but leave the machine unplugged from the electricity supply.5. Leave the water running through the machine for a period of 5-7 minutes.6. Re-connect the black high pressure hose.7. Squeeze the handle of the trigger gun to draw the water through the hose and into the gun until water exits from the lance.8. Plug the machine back into the electricity supply and turn on at the on/off switch. 9. Squeeze on the trigger gun.If this does not resolve the problem, please contact your customer service team.
-
The filter is inside of the inlet pipe on your Pressure Washer. To locate this filter, unscrew the black water coupling on the inlet of the machine (where the garden hose attaches).The filter should be removed and cleaned regularly to ensure that your product works to full specification. For guidance on how to clean the filter please see ‘How do I clean the sieve/filter in the water connection inlet?’
-
The trigger will not lock in the 'on' position. This is a safety feature of the product. A Kärcher Pressure Washer will not function unless the trigger is being pressed.
-
Check that the safety lock has not been activated. This is located just below the trigger gun handle on the quick connect guns and is yellow in colour. If you have a 'U' Clip connect trigger gun, then the lock is a black triangle in the trigger itself.
-
We are currently in a transition phase with our T-Racer Patio Cleaners, which could mean that your patio cleaner has been delivered with a set of either Yellow or Grey nozzles, or a set of Green, Pink and Beige nozzles. The below information advises what colour nozzles you should be using with your pressure washer.If you received Yellow and Grey nozzles:For machines that produce less than 130 Max bar pressure (e.g. K2-K3), please use the grey nozzles. If you have a Kärcher Pressure Washer between 130-180 Max bar pressure (e.g. K4-K7), please make sure to use the yellow nozzles.If you received Green, Pink and Beige nozzles:For machines that produce less than 130 Max bar pressure (e.g. K2-K3), please use the green nozzles. If you have a Kärcher Pressure Washer between 130-145 Max bar pressure (e.g. K4-K5), please use the pink nozzles. If your machine produces over 145 Max bar pressure (e.g. K7), please use the beige nozzles.You need to use the matching high pressure nozzles to ensure that your high pressure cleaner works properly. If you would like any help in how to change the nozzles on your patio cleaner please see How do I change the nozzles on my Patio Cleaner?’
-
Only Kärcher branded accessories are compatible with our range of Pressure Washers.
-
A free-flow connector should be used on the end of the hose which connects on to the machine. A non-return valve/Aquastop connector should be used to connect the garden hose to your tap.For further information regarding setting up you pressure washer, please see How do I set up my Pressure Washer?
-
Kärcher pressure washers are able to be used from a mains supply tap, or from a static water source, such as a water butt or bucket.All of our pressure washers can be gravity fed from a water butt. You can do this by attaching a standard garden hose to a tap on the front of the water butt.The K4 - K7 ranges of machines are also able to use a suction hose with a water butt or bucket. The KHB 5 can also be used with a suction hose however this is a separate suction hose from the K4-K7 range and is part number 2.644-124.0.Please see our helpful video below on how to do this:For further information, please download our helpsheet Using your domestic Pressure Washer with an alternative water source.pdf
-
Cleaning your car is no longer a chore with a Kärcher pressure washer - it's great way to save time and money, as you'll never have to pay for a car wash again! The pressurised water lance gets rid of mud, grit, salt and other debris that may scratch the paintwork when using a traditional bucket and sponge, and you can adjust it for gentle application of detergent, or a more powerful spray for stubborn mud! Please view our handy video below:
-
The Kärcher Chassis Cleaner is effective in effortlessly removing dirt, sludge, mud, sand and salt deposits. It is suitable for vehicle heights from 11cm to 38cm. It can be used on sports cars, off-road vehicles, caravans and trailers.
About Us
-
The BAR is a metric unit of pressure. 1 bar refers to 1 atmosphere of pressure. This is equivalent to 14.5 psi, or .1 Mega Pascal, or Mpa.The BAR pressure of your machine can be found in the technical specification information in your operating manual.
Create New Account
Validate your login
Sign In